1. Pre-Session Protocols - How do I prepare for my first session?
Answer: Pre-Session Protocols - How do I prepare for my first session?
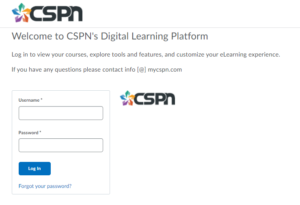
Step 1: Setup Your Brightspace Digital Learning Platform Account
You will receive an email from info@mycspn.com with the following details:
From: CSPN [info@mycspn.com]
Sent: September 23, 2020 3:23 PM
To:
Subject: CSPN: Digital Learning Platform Welcome
Step 2: Sign-in to Brightspace
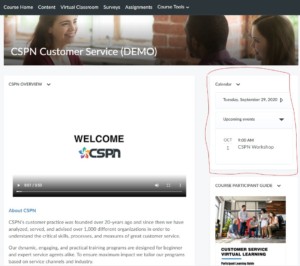
Step 3: Become familiar with the platform functionality. Take a look at the different tabs in the navigation bar: Course Home, Content, Calendar, Virtual Classroom, Survey
Step 4: Download and save a copy of your Participant Guide. You can find this in the Course Home on the right hand side under Participant Learning Guide
Step 5: Bring a pen/pencil and a pad of paper to take notes
Step 6: Find a quiet space with limited distractions and use headphones/earphones
Step 7: Grab a glass of water/beverage and snack
Step 8: Complete your survey at the end of your session. Your feedback is very important to us
Step 9: Have Fun!
2. I can't log in.
Answer: I can't log in.
Here are the steps to sign-in to Brightspace:
Step 1: Use the link: https://cspn.brightspace.com to sign-in to your new Brightspace account
Step 2: If you have not created a password for your account, please create one first.
Step 3: Once you have created a password, back on the log in page, you will enter your username and newly created password. Your username is firstname.lastname (not your email address)
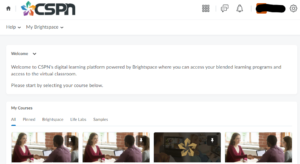
Step 4: Once logged in, you should see the home page with a welcome message and your courses below.
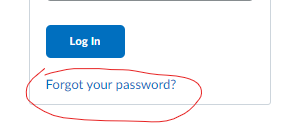
Step 5: If you require a password reset, go to the log in page and click on Forget Your Password
Step 6: If you are still unable to log in, please check with your systems administrator or I.T. department to see if your email address has any restrictions in accessing our log in page or link. If so, please contact us directly at info@mycspn.com and we will provide you with further instructions.
3. What is my username?
Answer: What is my username?
Your username is your firstname.lastname
For example:
- John.Doe
- Jane.Doe
4. My Password Reset Email Expired
Answer: My Password Reset Email Expired
Here are the steps to reset your password:
Step 1: Use the link: https://cspn.brightspace.com to access the log in page
Step 2: Click on the FORGOT YOUR PASSWORD
Step 3: You will receive an email with the following details. If you do not see this in your inbox, please check your spam or junk mail.
From: CSPN [info@mycspn.com]
Sent: [Date]
To: [Receiver Name]
Subject: CSPN Password Reset
Hi [Name],
To reset your password for CSPN, click the reset password link below and follow the on-screen instructions. Note that the reset password link expires 72 hour(s) after your initial request.
Reset my password

Step 4: Click on the link RESET MY PASSWORD in the email.
Step 5: Follow the on-screen instructions and update your password details.
Step 6: Please note that the reset password link EXPIRES IN 72 HOURS after your initial request. If you received a message that the reset password link has expired, click on the RESET MY PASSWORD to request a NEW reset password link.
Step 7: If you are still unable to log in, please check with your systems administrator or I.T. department to see if your email address has any restrictions in accessing our log in page or link. If so, please contact us directly at info@mycspn.com and we will provide you with further instructions.
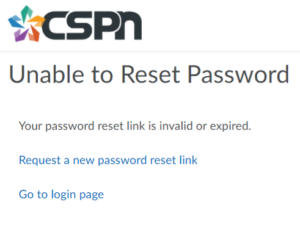
Answer 2: Unable to Reset Password
Please note that the reset password link EXPIRES IN 72 HOURS after your initial request. If you received a message that the reset password link has expired, click on the RESET MY PASSWORD to request a NEW reset password link.
If you are still unable to log in and receive this message, please contact info@mycspn.com and we will provide you with further instructions.
5. I am having trouble accessing my account and sessions.
Answer: I am having trouble accessing my account and sessions.
Here are the steps to accessing your sessions:
Entering Your Session
Step 1: Click the training session you are joining on the right hand sidebar under Calendar
Step 2: Click Enter Meeting Room

Step 3: Enter your first name and last name and click JOIN MEETING
Step 4: Setting up your AUDIO
Step 5: Click the microphone icon to connect both your microphone and speakers

Please Note: You will need to allow permission for your browser to access your microphone
Step 6: Complete the Echo Test
If you don’t see the microphone symbol, you are not connected. Please click Join Audio.
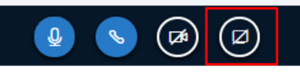
Step 7: Sharing Your Webcam
Step 8: To start, click the Video Menu icon

Step 9: Click Share Webcam
Step 10: After clicking on the Share Webcam button, you will need to ’Allow Bongo’ access to your webcam when prompted
Please Note: You may also need to Allow access to the camera in your system Privacy settings
Chatting in the room
Step 1: To open Public Chat, click on the Chat icon in the top left corner

Step 2: Type in the text box and press the Enter or Return key to send your chat message
Breakout Rooms
When you are joining in on a breakout room assigned by your facilitator, please follow the following protocol.
Step 1: Click Join Breakout Room button found at the top of your screen
Please note that a NEW TAB in your browser will open. You will return back to the main space when the breakout room time ends
Step 2: Setting up your AUDIO.
Please note that you will need to set up your audio and video every time you enter a new room.
Step 3: Click the microphone icon to connect both your microphone and speakers
Please Note: You will need to allow permission for your browser to access your microphone
Step 4: Complete the Echo Test
If you don’t see the microphone symbol, you are not connected. Please click Join Audio.
Step 5: Sharing Your Webcam
Step 6: To start, click the Video Menu icon
Step 7: Click Share Webcam
Step 8: After clicking on the Share Webcam button, you will need to ’Allow Bongo’ access to your webcam when prompted
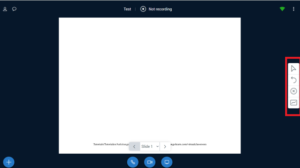
Annotation Tools
When enabled by the facilitator, the Annotation Toolbar will be become accessible. You can use annotation tools including a pointer and drawing tools to participate in discussions and activities.

Polls
When a Poll appears, click an answer (found at the top of your screen) to participate.
Video Tutorial: I am having trouble accessing my account and sessions.
If you are unable to see your sessions, please kindly review the video link below for more information on logging in, accessing your sessions and locating your dates and times of each session.
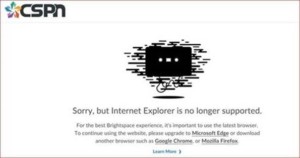
6. My browser is not supported - Supported & Unsupported Browsers
Answer: My browser is not supported - Supported & Unsupported Browsers
Here are the steps if you are unable to access the CSPN Brightspace platform on your browser:
Step 1: Open Google Chrome (or any other supported browser) and copy the link and paste the link into the address bar.
Here’s a list of all the supported browsers – https://documentation.brightspace.com/EN/brightspace/requirements/all/browser_support.htm
Address Bar on Google Chrome:

Step 2: To obtain the link, using your mouse, right click
Step 3: Click on Edit the Hyperlink
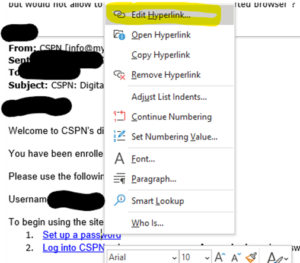
Step 4: You will then see a new window pop up.
Step 5:Copy the full link.
Link : ![]()
![]()
Step 6: Paste the full link into the Address Bar on Google Chrome:
Note: Ensure you are entering your username mentioned in the email and not your email address.
Answer 2: My browser is not supported - List of Supported Browsers
Desktop Computers
Brightspace Learning Environment is supported on the following desktop platforms with the latest browser versions:
| Platform | Apple® Safari® | Google® Chrome™ | Microsoft® Edge | Mozilla® Firefox® |
|---|---|---|---|---|
| Apple® Mac OS® | Yes | Yes | Yes | Yes |
| Microsoft® Windows® | No | Yes | Yes | Yes |
Tablets and Mobile Devices
Brightspace Learning Environment is supported on the following tablets and mobile devices with the latest browser versions:
| Platform | Apple® Safari® | Google® Chrome™ | Microsoft® Edge | Mozilla® Firefox® |
|---|---|---|---|---|
| Apple® iOS® for iPhone® and iPad® | Yes | No | No | No |
| Android™ OS for Android phones and tablets | No | Yes | No | No |
Here’s a list of all the supported browsers – https://documentation.brightspace.com/EN/brightspace/requirements/all/browser_support.htm
Answer 3: Google Chrome - Preferred Browser - Other alternatives
Chrome is also a preferred browser and can be downloaded here.
If you wish to continue using Microsoft Edge, the latest version will need to be updated. Here is the link to assist: https://www.howtogeek.com/672726/how-to-update-microsoft-edge/
Here’s a list of all the supported browsers – https://documentation.brightspace.com/EN/brightspace/requirements/all/browser_support.htm
7. Time Zone Differences – Account Settings
Answer: Time Zone Differences – Account Settings
Our platform is set on the Eastern Standard Time Zone (EST) as our organization is based in Ontario. The times are in EST but reflected to display your actual session time (i.e. PST, MST or AST).
For example: your session is at 10:30AM EST
- 7:30AM PST
- 8:30AM MST
- 12:30PM AST
Here are the steps if you would like to update your account settings to reflect your time zone:
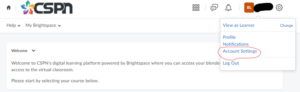
Step 1: At the top of the screen, click on your name.
Step 2: Click on Account Settings.
Step 3: When you have accessed your Account Settings , scroll all the way down to the bottom until you see Time Zone.
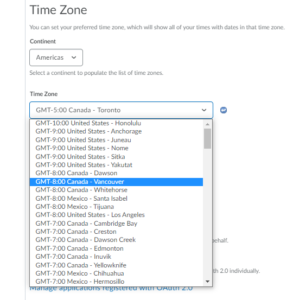
Step 4: Select your time zone (for an example: we’ve selected Vancouver).
Step 5: Save and Close.
Step 6: Check your sessions to see if the times have been updated to reflect your time zone.
8. I can't hear or see the session.
Answer 1: I can't hear or see the session - Setting up your Audio
Step 1: Setting up your AUDIO
Step 2: Click the microphone icon to connect both your microphone and speakers
Step 3: Another pop up message may appear asking you to ALLOW to use your microphone. Select ALLOW.
Please Note: You will need to allow permission for your browser to access your microphone

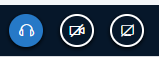
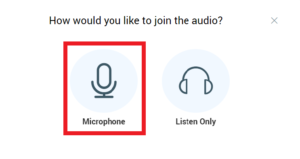
Please note that if you selected Listen Only (headset icon in the blue below), the individuals in the room will not be able to hear you. To update your audio settings, follow these steps:
STEP 1: Whichever you see on your screen, click on either the headset icon in the blue or the phone icon in the blue
 OR
OR 
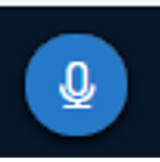
STEP 2A: If you selected the headset icon, reselect Microphone. You should now see a Microphone Icon as shown below.
STEP 2B: If you selected the phone icon, the hovered message will say Leave Audio. Click on the Phone Icon and then reselect Microphone. You should now see a Microphone Icon as shown below.

STEP 3: If the steps above did not work, please kindly exit the session and re-enter the room and select Microphone.
Step 4: Complete the Echo Test
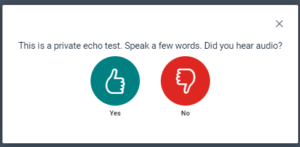
Step 5: If you don’t see the microphone symbol, you are not connected. Please click on the crossed out telephone icon (shown below to the left) and Join Audio. Follow Steps 1-4 above.

Step 6: Sharing Your Webcam
Step 7: To start, click the Video Menu icon
Step 8: Click Share Webcam
Step 9: After clicking on the Share Webcam button, you will need to ’Allow Bongo’ access to your webcam when prompted
Please Note: You may also need to Allow access to the camera in your system Privacy settings
Answer 2: I can't hear or see the session - Internet Connection & Signal
Please check your Internet Connection.
Step 1: To view your connectivity, find the signal icon on the top right corner of your screen.

Step 2: If your signal is in the GREEN, your connection is good. If your signal is in the RED, your connection may not be as smooth and you may experience video or audio inconsistencies.
Step3: If your internet connection is in the RED, please check with your internet provider or the I.T. department of your organization.
Step 3A: Another option is to move to another location within your space to see if the signal gets better.
Answer 3a: [Google Chrome] I can't hear or see the session - Message: notallowederror: permission denied
If you received the message “notallowederror: permission denied”, please follow the steps below.
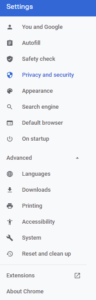
Step 1: On your BROWSER, click the HOUSE ICON ![]()
![]() or the 3 STACKED DOTS on the far right of your browser to the right of the address bar
or the 3 STACKED DOTS on the far right of your browser to the right of the address bar
Step2 : A new tab or new page will appears. Click Privacy and Security from the menu on the left side.
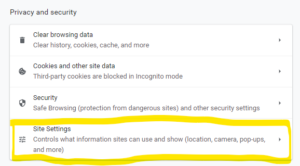
Step 3: Now, scroll down the page to find Site Settings and click this option
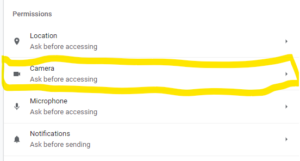
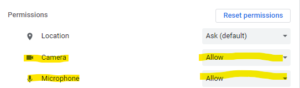
Step 4: Under Permissions, find Camera. Click this option.
Step 5: If you have more than one camera, ensure the CORRECT CAMERA is selected at the top of this screen
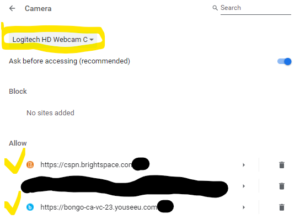
Step 6: Under the Allow section, look for the BONGO link. Click this.
Step 7: Under Permissions, look for Camera and check that Camera is set to Allow
Step 8: Refresh or Reload the meeting page and try to share your camera again.
Additional resource: https://support.google.com/chrome/answer/2693767?co=GENIE.Platform%3DDesktop&hl=en
Answer 3b: [Microsoft Edge] I can't hear or see the session - Message: notallowederror: permission denied
If you received the message “notallowederror: permission denied”, please follow the steps below.
Step 1: On your BROWSER, click the 3 STACKED DOTS ![]()
![]() on the far right of your browser to the right of the address bar
on the far right of your browser to the right of the address bar
Step 2: A menu will appear and select SETTINGS![]()
![]()
Step 3: A new tab or new page will appears. Click Cookies and Site Permissions from the menu on the left side.
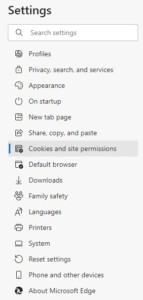
Step 4: Now, scroll down the page to find Cookies and site permissions and click this option ![]()
![]()
Step 5: Under Permissions, find Camera and/or Microphone. Click this option.

Step 6: If you have more than one camera, ensure the CORRECT CAMERA AND/OR MICROPHONE are selected at the top of this screen
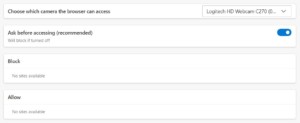
Step 7: Under the Allow section, ensure the BONGO link is not blocked. Click this.
Step 8: Under Permissions, look for Camera and check that Camera is set to Allow
Step 9: Refresh or Reload the meeting page and try to share your camera again.
Answer 4: Verify your Sound Settings
If you are able to successfully connect your audio and video on Bongo but you cannot HEAR YOURSELF SPEAK, please try the following steps below.
Step 1: On your DESKTOP/DEVICE, locate your sound settings.
To locate this, go to your START MENU (which may be located at the bottom left of your screen) and type and search “SOUND SETTINGS“.
OR
On the bottom right of your screen, you can RIGHT CLICK on the SOUND ICON ![]()
![]() , and a menu will appear with a few of the following items. Click on OPEN SOUND SETTINGS.
, and a menu will appear with a few of the following items. Click on OPEN SOUND SETTINGS.
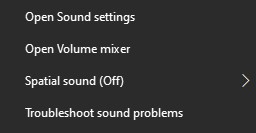
Step 2: A new window may pop up.
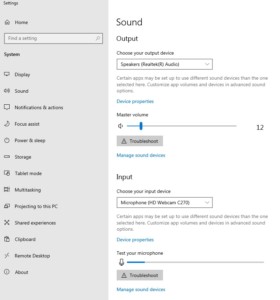
Step 3: Take a look at your settings under the INPUT section.
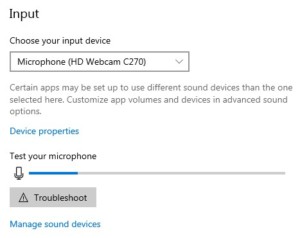
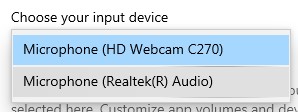
Step 4: Verify which microphone is being used by selecting from the drop down menu under “Choose your input device“.
Step 5: Test the volume level of your microphone by speaking into your microphone. If you’ve selected the correct microphone, you should see the volume level bar increasing and decreasing under the “Test your microphone” section.

Answer 5a: I can't hear or see the session - Ensure you are logged out of other applications
If you are able to successfully join the session on Bongo but you cannot HEAR YOURSELF SPEAK OR ACTIVATE YOUR WEBCAM/CAMERA, please try the following steps below.
Step 1: Ensure you are logged out of all applications such as MS Teams, Zoom, Webex or tools that may be utilizing your microphone/webcam.
Step 2: If you are working from a device that requires you to log into an organization’s platform/portal, we recommend OPENING a NEW BROWSER and copy and paste the CSPN LOGIN LINK: https://cspn.brightspace.com/ into the ADDRESS BAR.
Step 3: If you are accessing the login page from an external source, we recommend OPENING a NEW BROWSER and copy and paste the CSPN LOGIN LINK: https://cspn.brightspace.com/ into the ADDRESS BAR.
Step 4: Ensure your microphone and webcam are turned on and activated. You may need to check your Sound/Video Settings on your desktop or device or check the physical device to ensure cords and buttons are plugged in or turned on.
Answer 5b: I can't hear or see the session - Other Symptoms
Other Symptoms
- Connect using a different microphone if available. The users can use https://www.onlinemictest.com/ to check that their browser has permission to use the microphone.
- Check for other apps that use the microphone and close those apps.
- The supported browsers are Chrome, Microsoft Edge (Chromium) and Firefox. When using Bongo, you must be using one of those 3 browsers for full functionality. Your Internet browser must be up-to-date (installed or updated within the last month).
- https://bongolearn.zendesk.com/hc/en-us/articles/360019804913-Audio-Video-Basics-in-Virtual-Classroom
- https://bongolearn.zendesk.com/hc/en-us/articles/360016009854-Troubleshooting-Within-Virtual-Classroom
The Symptoms:
Symptom 1: The Echo Test fails when you join the meeting space.
Symptom 2: Other participants cannot hear you.
Symptom 3: You see a popup message that says “ICE negotiation failed”.
The Solution:
Step 1: Check for other apps that use the microphone (Google Hangouts, Webex, etc.) and close those apps if they are in use.
Step 2: Use this website’s service to check that your browser has permission to use the microphone. If the browser doesn’t have permission, you need to change the microphone permissions in FireFox (Options > Privacy & Security > Permissions > Microphone) or Chrome (Settings > Advanced > Privacy & Security > Content Settings > Microphone)
Step 3: Try a different browser. We recommend Chrome, Microsoft Edge (Chromium) or Firefox.
Step 4: You may have multiple microphones connected to your computer, such as a built-in microphone on a laptop and a pair of headphones with an inline mic. The default microphone may not be the one Virtual Classroom is listening to, so check your browser for default settings. (in Chrome you change the default in Settings > Privacy and Security > Content settings > Microphone, in Firefox it’s Preferences > Privacy and Security > Permissions > Microphone).
Step 5: Try selecting a different microphone in the menu in Bongo.
Step 6: If you see the “ICE negotiation failed” message, try turning off Windows firewall (on PCs), disconnecting any VPN connections, turning off virus network protection, and disabling extra browser plugins/extensions.
8a. Interactive Connectivity Establishment (ICE) Error Codes
Answer: 8a. Interactive Connectivity Establishment (ICE) Error Codes
If you are receiving error message with “ICE” codes, please refer to the link here: https://community.brightspace.com/s/article/000006512
Common ICE Codes may be 1007, which may refer to a firewall block.
Since the firewall block is controlled by your IT Team. Please contact your IT Team and ensure the VPN and firewall settings are matching the Bongo’s criteria as listed here: https://bongolearn.zendesk.com/hc/en-us/articles/360008004153-Network-Ports-Used-by-Virtual-Classroom
If issues continue to appear, please contact us at info@mycspn.com.
9. Virtual Breakout Rooms - I cannot hear anybody or view the screen
Answer: Virtual Breakout Rooms - I cannot hear anybody or view the screen
When you are entering a Breakout Room, please note of the following:
Item 1: A NEW WINDOW tab will open on your browser.

Item 2: This tab will request you to join a Breakout Room

Item 3: You will need to complete the AUDIO TEST again and select MICROPHONE
Item 4: The first participant entering the room can annotate and can share their screen. Annotation tools include:
- Pan, Draw, Text
- Undo Annotations
- Clear All Annotations
- Turn Multi-User Mode On (which allows everyone else in the room to annotate)

Item 5: Share Screen
Please note every time you enter or re-enter a room, you will need to complete an audio test.
10. I am still having issues!
Answer: I am still having issues!
If you are still experiencing technical issues or have any questions, please contact info@mycspn.com.
11. Where do I complete the Feedback Survey?
Answer: Where do I complete the Feedback Survey?
After your session, please kindly complete the Feedback Survey. Your feedback is very important to us.
Here are the steps to access your Feedback Survey:
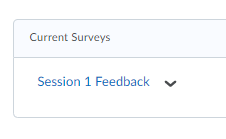
Step 1: Go to the Navigation Bar at the top

Step 2: Select Survey
Step 3: Select Session Feedback to start
12. Where do I receive my certificate/award?
Answer: Where do I receive my certificate/award?
Here are the steps to obtain your certificate:
Step 1: Log into your Brightspace account with your username and password – https://cspn.brightspace.com/
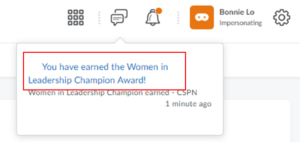
Step 2: Once logged in, you will see a notification in 2 areas
TOP OF YOUR SCREEN: Under the Message Icon, you will receive a message notifying you that you have earned an award.
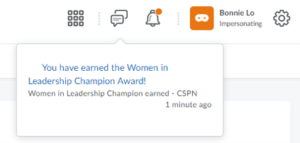
BOTTOM OF YOUR SCREEN: At the bottom of the screen, there may also be a message congratulating you on an award
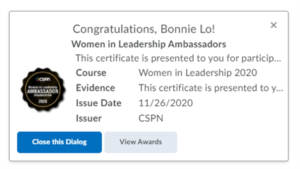
Step 3: To access your award/certificate, click on the link “You have earned the Women in Leadership Award” or “View Awards” highlighted in the red box above.
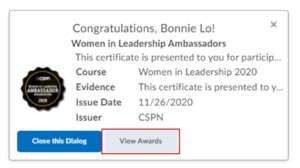
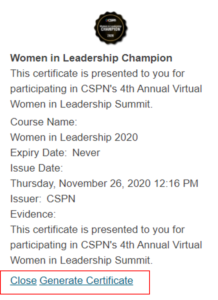
Step 4: A window may pop up, click on the image.
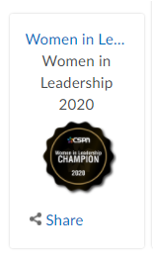
Step 5: A new window will pop up and you will have the option to download your certificate by clicking on “Generate Certificate”
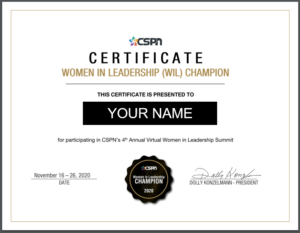
Step 6: Your certificate will look something like this:
Step 7: A document should be downloaded and you will have the option to save a copy to your desktop/devices. To do this, click on the downloaded file. A new tab in your browser will open. On the top right hand corner of the screen, you may see 3 icons. Select the middle icon with the arrow pointing down.